






Installing an All-In-One (AIO) solar street light is significantly faster and easier than traditional split-type systems. Because the solar panel, lithium battery, LED lamp, and controller are integrated into a single unit, the “Plug & Play” design reduces installation time and minimizes cabling work.
This guide covers everything from foundation preparation to the final testing phase, ensuring your Sirius or Galaxy series lights operate at peak efficiency.
How do you install an all-in-one solar street light?
The installation process involves five key steps:
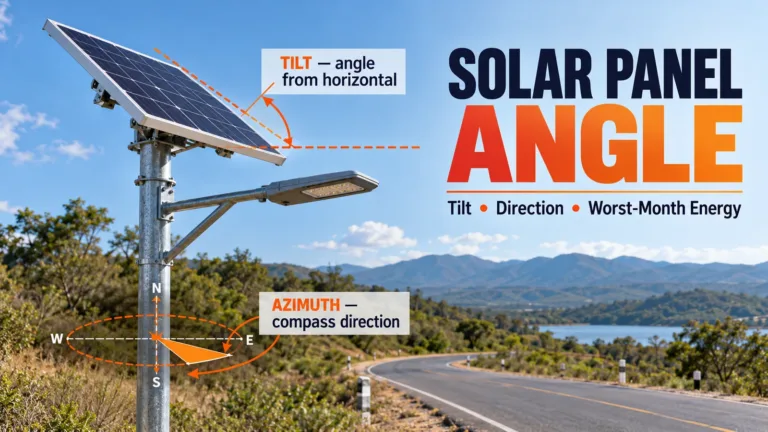
- Site Selection: Ensure the location is free from shading (trees/buildings) and allows the solar panel to face the equator (South in the Northern Hemisphere).
- Foundation Work: Dig a pit and install the foundation kit (anchor bolts) using concrete.
- Assembly: Mount the integrated light fixture onto the pole arm and secure it with screws.
- Wiring: Connect the waterproof “Plug & Play” cables between the solar panel and the lamp body.
- Erection: Hoist the pole upright, align the flange with the foundation bolts, and tighten the nuts.
Phase 1: Pre-Installation Preparation
Before digging, you must ensure you have the right tools and the correct location.
1. Site Selection & Orientation
- Avoid Shadows: Solar street lights require direct sunlight. Ensure there are no obstructions like tall buildings or trees above the installation site. Shadows can cause the battery to enter a deficit state, leading to shorter lighting times.
- Direction: For maximum charging efficiency, the solar panel must face True South (in the Northern Hemisphere) or True North (in the Southern Hemisphere). The Sirius (INL-AIO8-A) series allows you to adjust the lighting source horizontally and vertically to align the light with the road while keeping the panel oriented correctly.
2. Component Inspection
Ensure you have all the necessary parts. A standard AIO kit includes:
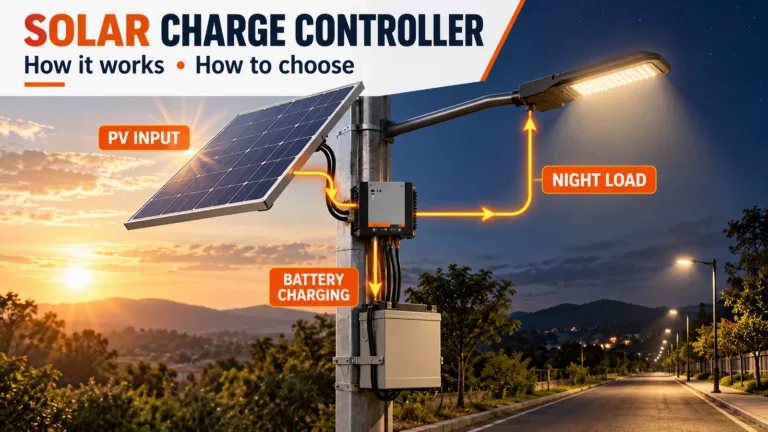
- Integrated Light Body: Contains the LED module, MPPT controller, and LiFePO4 battery.
- Solar Panel: Often mounted on top or integrated.
- Lighting Pole: Usually Q235 steel with hot-dip galvanization.
- Foundation Kit: Detachable anchor bolts and nuts.
Phase 2: Foundation Construction
A stable foundation is critical for safety, especially to withstand high winds.
- Digging the Pit: Excavate a pit according to the pole height and local soil conditions.
- Install Foundation Kit: Assemble the foundation kit using the provided Q235 steel anchor bolts. These are detachable for easier transport.
- Pouring Concrete: Place the foundation kit into the pit and pour concrete to fix it in place. Ensure the screw threads remain exposed above the concrete level.
- Curing: Allow the concrete to dry and cure completely before mounting the pole.

Phase 3: Assembly and Wiring (Ground Work)
It is safer and easier to assemble the light on the ground before lifting the pole.
1. Assembling the Pole
If your pole comes in segments (to save transport costs), assemble the tapered or polygonal sections on the ground. Ensure the flange is clean and ready for mounting.
2. Mounting the AIO Light
- Attach the Sirius or AIO fixture to the top of the pole or the lighting arm.
- If using the Sirius (INL-AIO8-A), you can adjust the LED module vertically to cast light wider across the road.
3. Plug & Play Wiring
The most distinct advantage of the All-In-One design is the simplicity of wiring:
- Locate the cables from the solar panel and the lamp body.
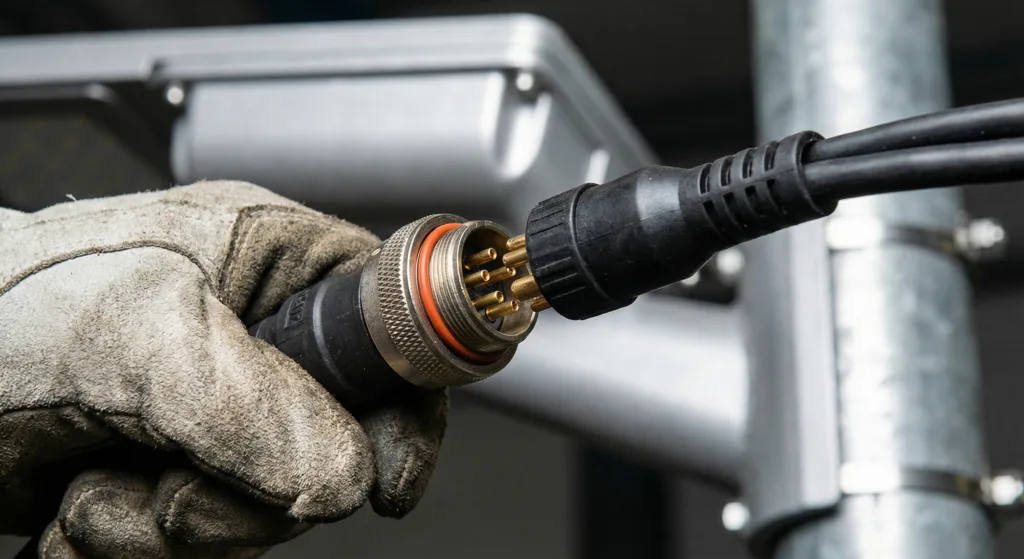
- Match the Socket: Align the holes of the plug & play sockets accurately.
- Connect: Push the waterproof cap up to the socket and spin it to tighten. This ensures an IP66 waterproof seal.
- No Complex Cabling: Unlike split systems, there is no need to run complex cables inside the pole for the battery, as the battery is already integrated into the light housing.
Phase 4: Erection and Final Fix
- Hoisting: Use a crane or a pulley system to lift the assembled pole.
- Alignment: Align the pole’s bottom flange with the foundation kit bolts protruding from the concrete.
- Bolting: Secure the pole using the anti-corrosion galvanized nuts and washers. Ensure the pole is vertical and not leaning.
- Orientation Check: Before fully tightening, do a final check to ensure the solar panel is facing the correct direction (South/North).

Phase 5: Testing and Troubleshooting
Once installed, the system should operate automatically.
- Daytime Test: If installed during the day, the light should remain OFF (charging mode). If you disconnect the solar panel, the light should turn ON after about one minute.
- Nighttime Test: The light should turn on automatically at dusk.
Common Troubleshooting Table
| Problem | Possible Cause | Solution |
|---|---|---|
| Light does not turn on at night | Solar panel connected in reverse or loose | Check if connectors are tight and polarity is correct. |
| Battery voltage too low | If voltage is <2.5V, the battery is damaged or fully drained. Wait for 2-3 sunny days to recharge. | |
| Short Lighting Time | Solar panel is shaded | Remove obstacles (trees/buildings) blocking the sun. |
| Panel orientation is wrong | Re-align panel to face South/North. | |
| Light on during the day | Solar panel disconnected | Reconnect the solar panel plug to the controller. |
Why Choose All-In-One Design?
- Easy Installation: No need for underground battery pits or complex wiring.
- Anti-Theft: The battery and controller are integrated into the light housing, making theft difficult compared to ground-buried battery systems.
- High Efficiency: Models like the Sirius use MPPT controllers and Grade A LiFePO4 batteries, ensuring 10+ years of lifespan.
Conclusion
Installing an All-In-One solar street light from a long-haul solar street light manufacturer is a straightforward process that eliminates the need for trenching and complex grid wiring. By following the “Plug & Play” protocols and ensuring proper orientation, your Sirius or Apollo series lights will provide reliable, high-lumen output for over a decade.
Need a DIALUX simulation for your road project? Contact Inlux Solar Engineering Team.
Frequently Asked Questions (FAQ)
Which direction should the solar panel face during installation?
In the Northern Hemisphere, the solar panel must face True South; in the Southern Hemisphere, it must face True North. This orientation ensures the panel receives maximum solar radiation throughout the day. If the panel faces East or West, the charging efficiency will drop significantly, leading to shorter lighting times or battery depletion.
What should I do if the light does not turn on immediately after installation?
First, check if it is daytime; the light is designed to remain OFF when the solar panel detects sunlight. If it is night and the light is still off, check the following:
1. Cable Connection: Ensure the waterproof plugs between the panel and light body are tightly connected and not reversed.
2. Light Interference: Ensure there is no other light source (like a billboard or security light) shining on the solar panel, as this will trick the sensor into thinking it is daytime.
3. Battery Charge: If installed after several cloudy days, the battery may be in low-voltage protection. Wait for 1-2 sunny days for it to recharge and self-recover.
Can I install the light under a tree or near a building?
No. You must ensure there is no shading over the solar panel. Shadows from trees or buildings will drastically reduce power generation, causing the battery to be in a deficit state. Even small shadows can trigger the “hot spot effect” or prevent the battery from fully charging, reducing the light’s operating time.
How do I determine the correct pole height and spacing?
The pole height is usually determined by the road width. For a single-row installation, the pole height should generally equal the road width. For example, if the road is 8 meters wide, use an 8-meter pole. The recommended spacing between poles is typically 3 to 5 times the pole height depending on the lighting requirement.
Do I need to wire the light to the main power grid?
No. All-In-One solar street lights are 100% off-grid systems. They rely entirely on the integrated solar panel and LiFePO4 battery. However, if you purchased a Solar AC Hybrid model (like the INL-AIT5), it will require a grid connection as a backup power source for continuous rainy days.
What maintenance is required after installation?
These lights are designed to be low maintenance, but keeping the solar panel clean is vital. Dust, bird droppings, or leaves can reduce charging efficiency. We recommend visually inspecting and cleaning the panels every 6 months, especially in dusty environments.
Will the light work during continuous rainy days?
Yes. The smart MPPT controller automatically adjusts the output power. As the battery voltage drops during rainy days, the system reduces the LED brightness to extend the lighting duration. However, if the rainy period exceeds the design limit (typically 3-5 days), the light may turn off until the sun returns to recharge the battery.
Why does the light turn on for a moment and then turn off during the day?
This usually indicates a connection or detection issue. If you disconnect the solar panel while the battery is charged, the light will detect “darkness” and turn on. If you connect it back, it detects “sunlight” and turns off. This is a standard way to test if the light fixture is working before hoisting it up the pole.